Data Integration
A problem to solve when working with multiple data sources is combining the data in order to provide information not available in each separate source. The process of combining such data is called data integration.
In this blog entry, we are going to explore a simple solution to combine data from different sources and build a report with the resulting data. For this purpose, we are going to use Pentaho Data Integration to create a transformation file that can be executed to generate the report. Our data sources will be a MySQL database and a Postgres database.
Data Sources
Before creating the Pentaho data transformation, we will need to define our data sources. For this example, we will just need one table per data source.
MySQL Data Source
We will need to create the following table in a MySQL database. This table does not have any dependency on another table, so it can be created in a new empty database.
In order to be able to combine the two data sources, we will need a common field in both. For this example, we are going to use the ‘email’ column. It is possible to have more than one column in more complex scenarios, but for this example, the email is enough.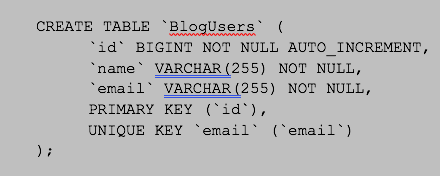
MySQL Sample Data
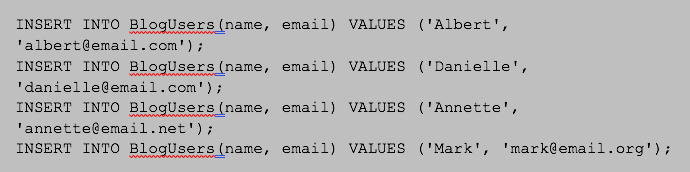
Once we created our table in the MySQL data source, we are going to fill it with our sample users:
Postgres Data Source
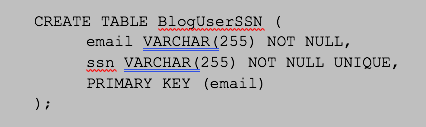
Now we also need to create a users table in our Postgres data source. This table can also be created in an empty database since it does not have any dependency on other tables. Notice, we also have an email column that we require in order to combine the information with the MySQL data source.
Postgres Sample Data
Finally, we will create our sample users data in Postgres with the following statements. Notice that we are not adding a ‘ssn’ value for all of our users in the MySQL data source.

Pentaho Transformation
Now, we are ready to start defining the transformation file in Pentaho. We are not going to show how to create the database connections since it is a pretty straightforward step and is not what we want to present this time.
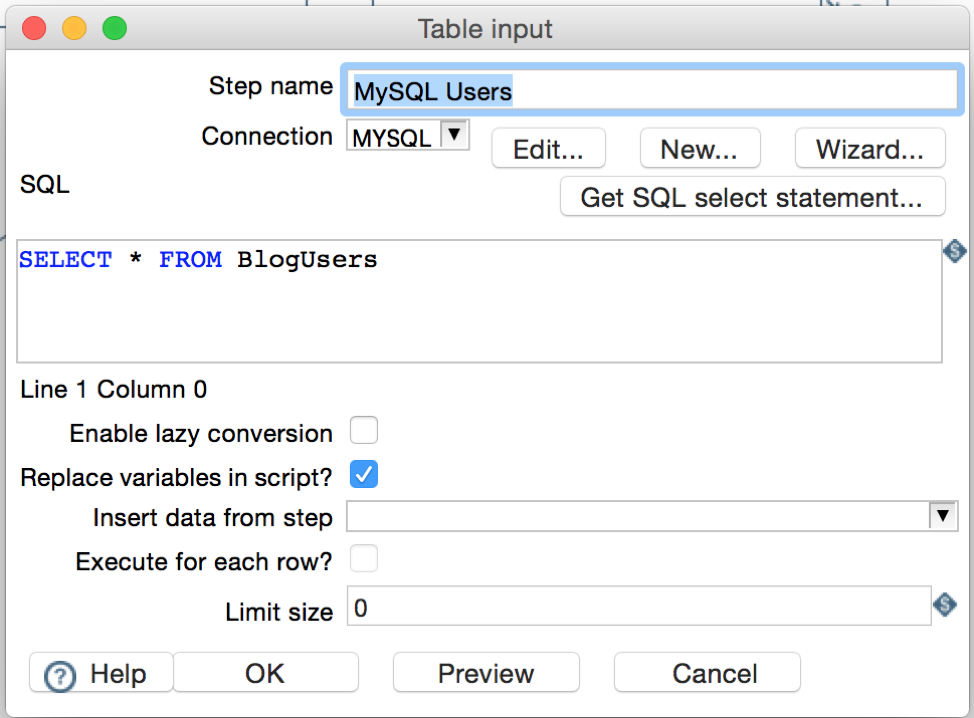
We will start the transformation by defining our MySQL data source with a Table Input. We need to make sure the Connection drop-down points to our MySQL data source. Then, for this example, we are simply going to select all users from our MySQL users table, as shown in the next picture. We could have more complex SQL statements if needed, but for this blog purposes we just need the data we added earlier.
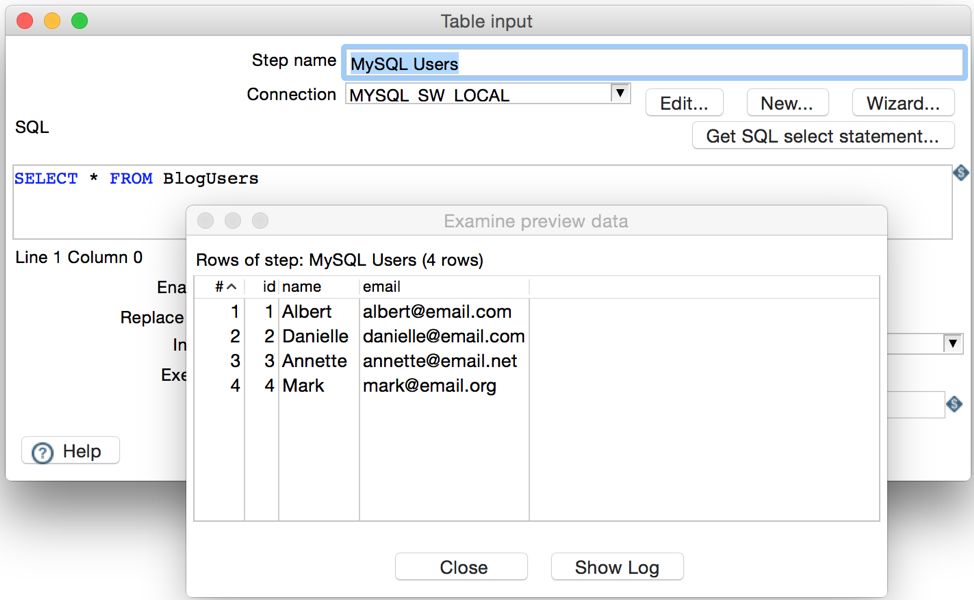
We can also preview the ‘Table Input’ step. This will allow us to check the connection and verify the data we are going to retrieve from the data source.
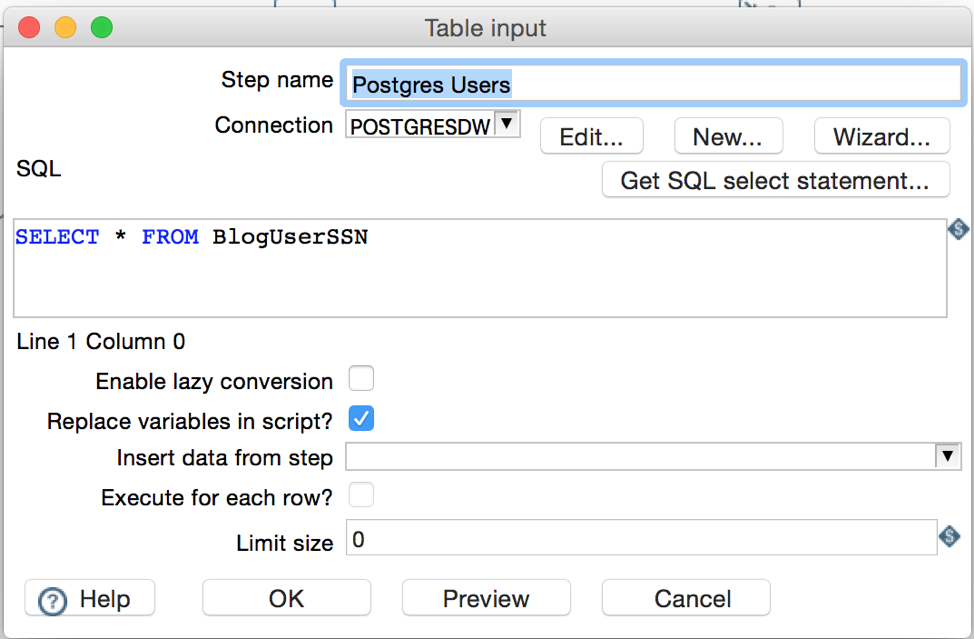
For the Postgres data source we will also need another ‘Table Input’ step. The configuration is similar as the previous one. We just need to make sure we select the proper data source from the ‘Connection’ dropdown and then add the SQL statements in order to retrieve the data.
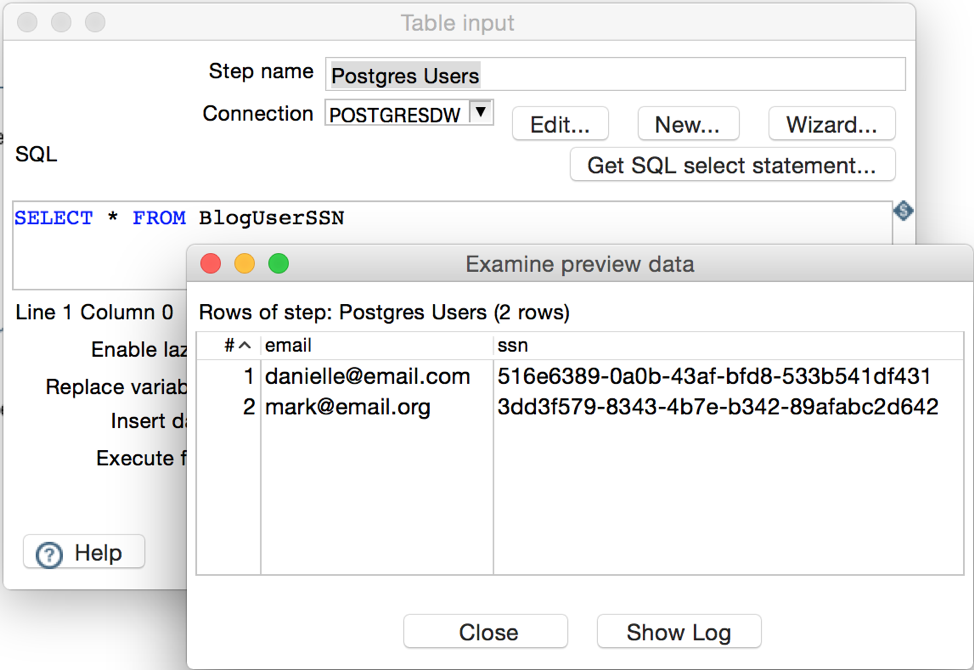
We can preview the data again, so we verify the Postgres connection and the SQL statements as well.
We now have our two data sources and we have checked they return the data we added to the database earlier. It is time to combine the information from both so we can create our report later.
For this step, we are going to use the ‘Merge Join’ step. This step will get the data from two other previous steps in the transformation, and then it will merge the resulting fields in a single result set.
Notice that we are joining our common column ‘email’. If we had more data in common we could add the corresponding fields under the ‘Keys for 1st step’ and ‘Keys for 2nd step’ tables.
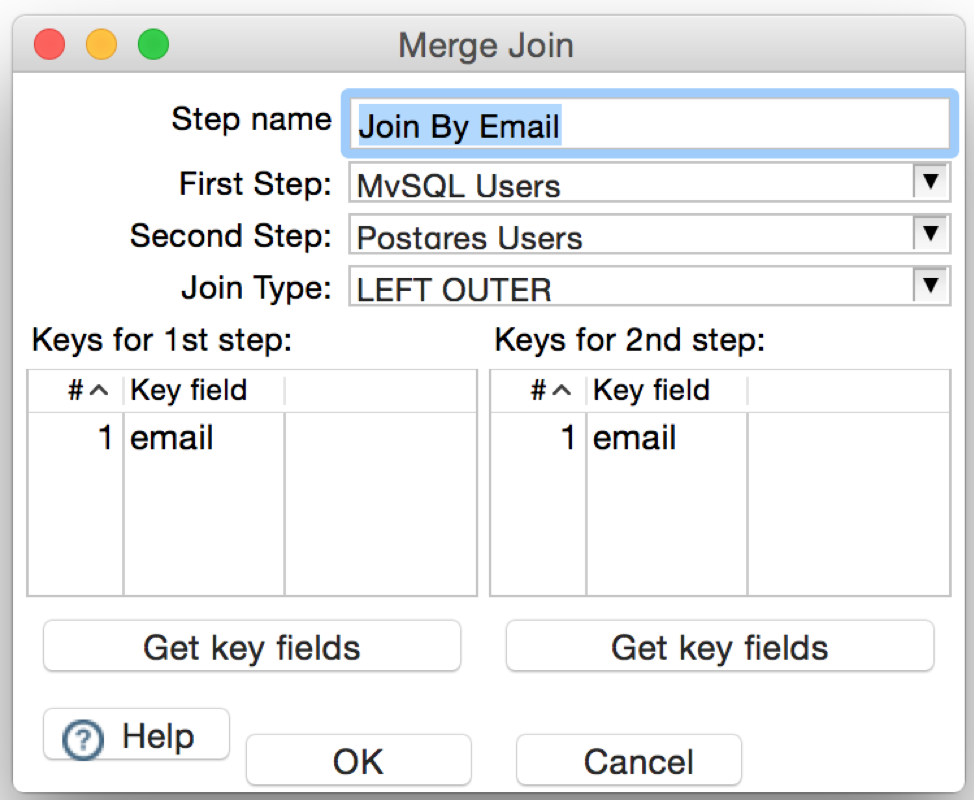
Notice that the selected “Join Type” corresponds to “LEFT OUTER”. This means that all rows from the “First Step” (MySQL data source in this case) will appear in the final result, even if they do not have a matching email in the Postgres data source. Other join types can be selected from the drop-down in order to change the behavior of the report.
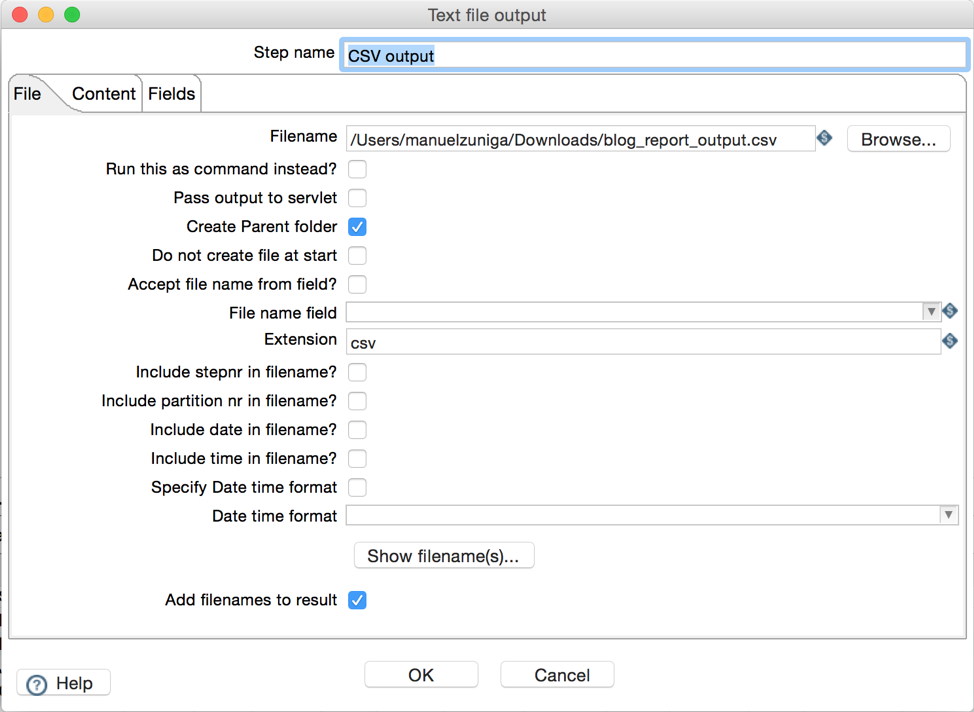
Finally, we will define a ‘Text file output’ step so we can get our report in a CSV file. The following two screens show the configuration values for this step.
The next screenshot shows the columns our report will contain. It is important to note here that the output columns must match fields from previous steps in the transformation. In this example we used the database column names, but these does not need to be always the case. SQL aliases can be used to change the default column names to something else.

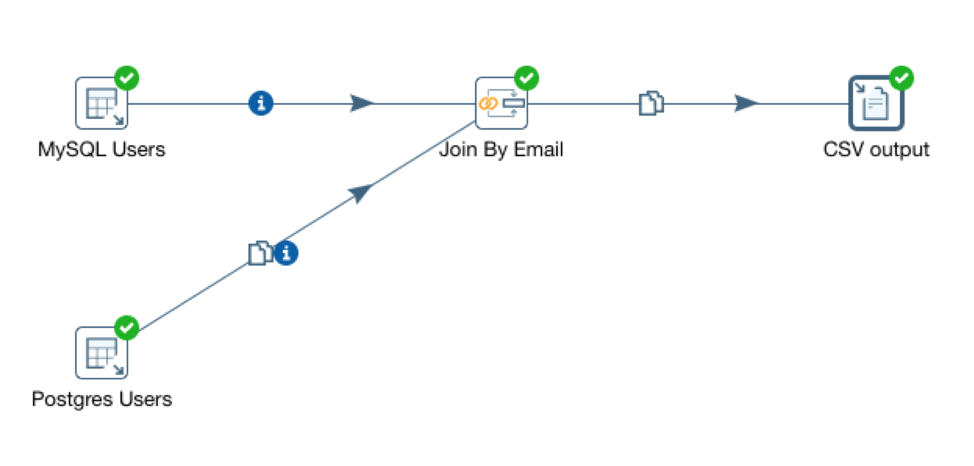
Now we have defined all the steps in the transformation, this is how the configuration looks like in the Pentaho editor:
Results
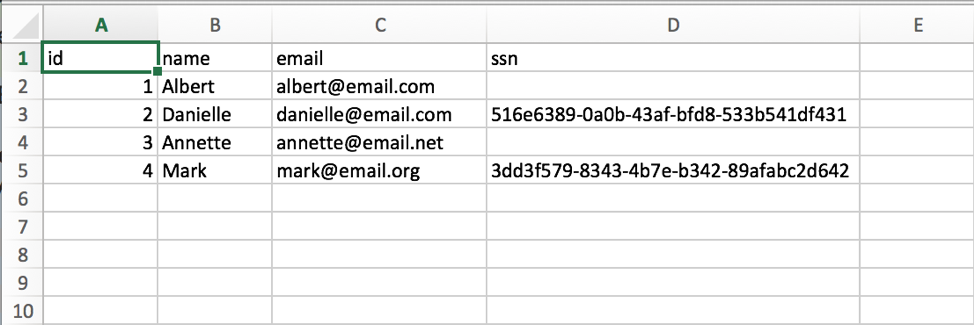
With the transformation complete, we can now execute the file and obtain the CSV report file. In the next screenshot we show the contents of the file for our sample. Notice that only two users have a value in the ‘ssn’ column. This is consistent with the join type we selected in the ‘Merge Join’ step: ‘LEFT OUTER’.
With that, we have successfully learned how to use Pentaho data integration.